Auto-Configure
Let AI generate your request and response mappings automatically. Paste any reference material about your endpoint and Rhesis handles the rest.
Auto-Configure requires an AI generation model configured in your organization settings (or the platform default). The feature uses this model to analyze your input and generate mappings.
When to Use Auto-Configure
Auto-Configure is ideal when you:
- Have a working endpoint but don’t want to write Jinja2 templates and JSONPath expressions by hand
- Want to quickly connect a new API and start testing immediately
- Need to map an unfamiliar endpoint format
- Want a starting point that you can refine manually
Prerequisites
Before using Auto-Configure, ensure you have:
- An AI generation model configured in Settings (or use the platform default)
- The endpoint’s URL (e.g.,
https://api.example.com/chat) - An authentication token for the target API (if required)
How to Use Auto-Configure
Fill in Basic Information
In the Create Endpoint form, provide:
- Name: A descriptive name for the endpoint
- URL: The full API endpoint URL
- API Token: Your authentication credentials for the target API
Click Auto-Configure
Once the basic information is filled in, the Auto-configure button (magic wand icon) in the action bar becomes active. Click it to open the Auto-Configure modal.
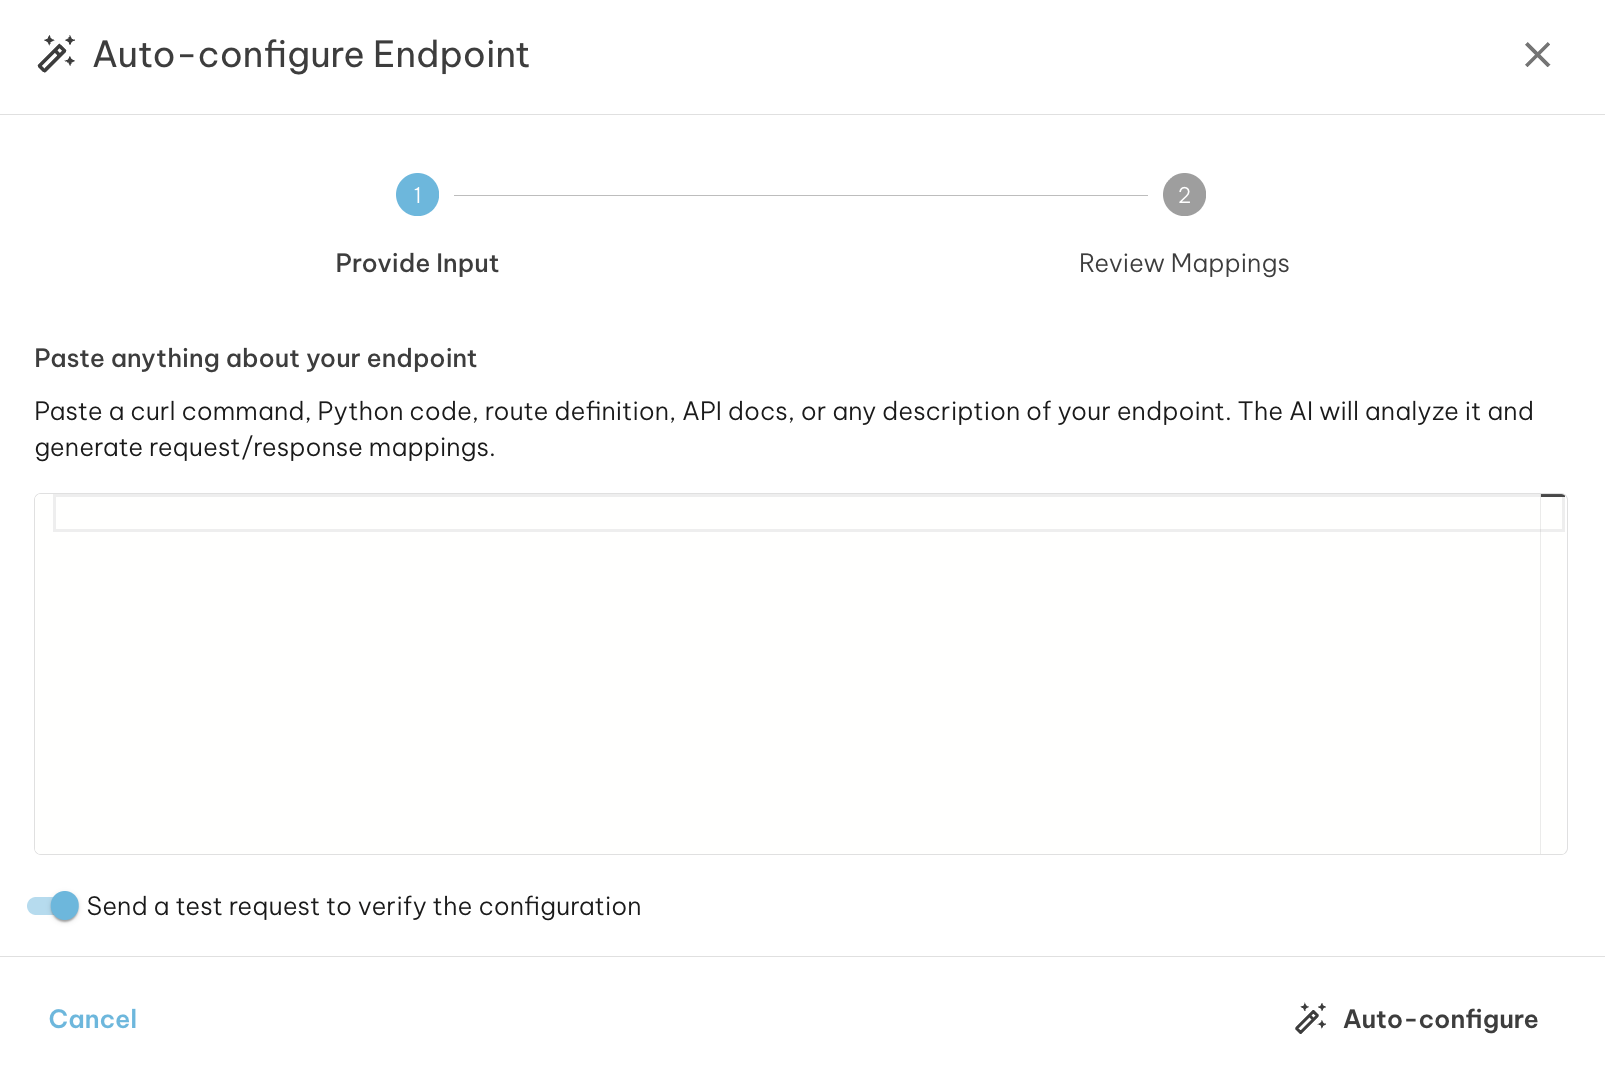
Paste Reference Material
In the modal, paste any reference material about your endpoint. See What Can You Paste? below for supported formats.
Run Auto-Configure
Click the Auto-configure button in the modal. The AI will:
- Analyze your input to understand the endpoint’s structure
- Optionally send a test request to your endpoint (if probing is enabled)
- Generate Rhesis-compatible request and response mappings
Review and Apply
Review the generated mappings, confidence level, and any warnings. Click Apply to Endpoint to populate the form with the generated configuration.
Test the Connection
After applying, switch to the Test Connection tab to verify the mapping works correctly with a real request.
What Can You Paste?
Auto-Configure accepts a wide variety of input formats:
curl Commands
The most reliable format. Paste a working curl command:
Python Code
Flask/FastAPI route handlers or `requests` library calls:
Sample Request/Response JSON
A pair showing the expected input and output:
API Documentation or Plain Text
Any description of your endpoint’s interface:
How It Works
Behind the scenes, Auto-Configure runs a multi-step AI pipeline:
- Parse: AI analyzes your input to identify the endpoint’s URL, HTTP method, request fields, and response structure
- Probe (optional): Rhesis sends a test request to your endpoint to capture the real response format
- Self-correct: If the probe fails, AI analyzes the error and adjusts the request — retrying up to 3 times
- Generate: Using the confirmed schema and real response, AI creates Rhesis-compatible Jinja2 request templates and JSONPath response mappings
When probing is enabled, Rhesis sends a real API call to your endpoint. Disable probing if your endpoint has side effects (e.g., creating records, sending emails, or charging credits).
Understanding Results
Confidence Levels
- High (green, 70%+): The mapping was verified via a successful probe and the AI is confident in the mapping
- Medium (amber, 40-70%): The mapping was generated but may need minor adjustments
- Low (red, below 40%): The mapping is a best guess and likely needs manual review
Warnings
Warnings highlight areas that may need attention:
- “Mapping generated but could not be verified”: The probe failed but mappings were generated from the input analysis alone
- “Could not determine the output field”: Set the
response_mapping.outputfield manually - “Multiple candidate input fields detected”: Review which field carries the user’s message
Probe Response
Click Show probe response to see the actual JSON response from your endpoint. This helps verify that the response mapping correctly extracts the fields you need.
When Auto-Configure Doesn’t Work
”No AI model configured”
Configure a generation model in Settings > AI Models or contact your administrator.
”Could not parse input”
The AI couldn’t identify an API structure. Try:
- Paste a working curl command — the most reliable input format
- Include both request and response examples
- Add more context about the endpoint’s expected fields
”Mapping generated but unverified”
The probe failed, but mappings were generated. This often happens when:
- The API requires specific field values that test data doesn’t satisfy
- Rate limits or IP restrictions block the probe
- The endpoint expects pre-existing state (e.g., a valid session)
Use the Test Connection tab to debug and refine the mapping manually.
Partial Results
When some fields couldn’t be mapped, apply the partial result as a starting point and fill in the missing fields manually. Even partial results save significant time compared to configuring everything from scratch.
Using Auto-Configure from the SDK
The Python SDK provides an auto_configure() class method as a code-first alternative to the UI modal:
Set probe=False to skip the live endpoint test:
For general SDK endpoint usage, see SDK Endpoints.
Tips for Best Results
- Provide a curl command with a real request body — the most reliable input format
- Include both request and response examples when possible
- Mention the response structure if your API returns nested JSON
- Specify the conversation pattern for multi-turn endpoints (messages array or conversation IDs)
- Review generated mappings before testing, especially for low-confidence results
- Use Test Connection after applying to verify the mapping works end-to-end